Ever tried to get a client to give you a computer name so you can identify what machine they are on? This can turn out sometimes to be not so easy. If you had Ninja, did you know you could do this with the system tray (the user doesn’t even need to be a local admin)?

The idea for this blog post just came to me after reading a question from one of our clients.
Did you know that in the System Tray Designer in Ninja (Administration > General > Branding > Systray (Tab) you can create a custom systray that can run completely custom commands as its menu items?
- Click Add to add a new Systray in Administration > General > Branding > Systray (Tab)
- Name your Systray appropriately, this is a Ninja side name not a client facing name, add a description if necessary
- Change or add an icon if you want a custom icon
- Add a tooltip (this is what appears if someone hovers over the Systray icon and is client facing
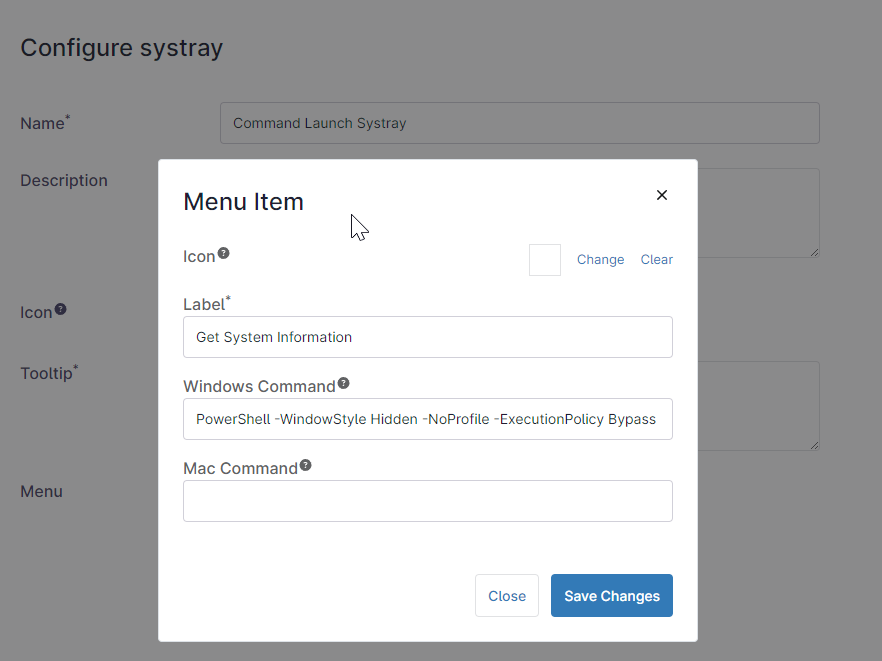
- Click Add Menu Item and choose the Launch from the type dropdown
- Set a label, this is the customer facing name that appears in the system tray
- Set an icon if you want it to have an icon in the Systray menu
- In windows command, enter:
PowerShell -WindowStyle Hidden -NoProfile -ExecutionPolicy Bypass -Command "& {[System.Reflection.Assembly]::LoadWithPartialName('System.Windows.Forms'); [System.Windows.Forms.MessageBox]::Show('Computer Name: ' + $env:COMPUTERNAME + ' | Logged on User: ' + $env:USERNAME)}" - Click Save Changes on the menu item, then Save Changes on the configure systray page.
- Your final result should look similar to this:
-
- The last step, if you haven’t done already, is to get the Systray on an organization. Open Administration > Organizations, choose your organization where you want to set the system tray and set it in the drop down:
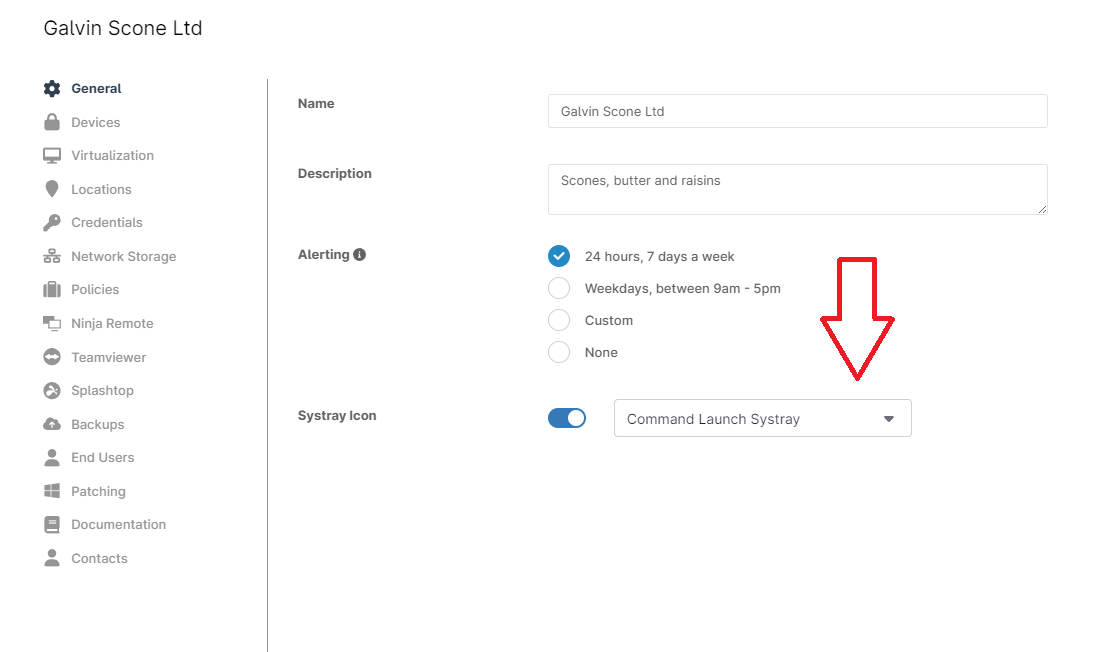
- Save your changes, give it a few minutes to deploy the system tray and let the magic happen!

Leave A Comment